Whether you’re recording a presentation, product demo, or tutorial, screen recording on a Mac is now easier than ever.
In 2026, you can capture, narrate, and share your screen using built-in macOS tools — or elevate your videos with AI-powered narration through AI Studios.
This guide covers everything you need to record your screen on Mac like a pro, from shortcuts to professional-level editing and AI integration.
Why Screen Recording Is Essential in 2026
From remote work to online education, video-based communication is the new standard.
Screen recording helps:
- 🧑🏫 Teachers create engaging lessons
- 💼 Teams record demos or explainers
- 🎥 Creators produce YouTube, TikTok, or training content
- 🌍 Marketers showcase products with visual storytelling
And with AI tools, you can now transform a simple screen capture into a full, narrated video — instantly.
1. Use macOS Built-in Screen Recording (QuickTime Player)
Every Mac comes with a free, powerful screen recording tool: QuickTime Player.
🎬 How to Record Your Screen Using QuickTime
- Open QuickTime Player (found in Applications).
- Go to File → New Screen Recording.
- Choose whether to record the entire screen or a selected portion.
- Click the Record button to begin.
- To stop, click the Stop icon in the menu bar or press
Command + Control + Esc. - Save your video anywhere on your Mac.
Pros:
- Free and built-in
- Reliable and high-quality output
- Works well with external mics
Cons:
- No webcam overlay
- Limited editing and voiceover features
2. Record Your Screen Using macOS Shortcut (Screenshot Toolbar)
macOS Mojave and later versions include the Screenshot Toolbar, an even faster way to record.
📹 How to Use Screenshot Toolbar:
- Press
Command + Shift + 5. - Select one of the options:
- Record Entire Screen
- Record Selected Portion
- Click Options to select the microphone and save location.
- Hit Record, and capture your content.
- Stop by pressing
Command + Control + Esc.
Pros:
- Easy keyboard access
- Simple and quick for short recordings
- Microphone input supported
Cons:
- No AI narration or branding tools
- Minimal customization
3. Use AI Studios Screen Recording for Professional AI Narration
If you want your screen recordings to look professional and sound natural, AI Studios by DeepBrain AI is the ultimate solution.
It goes beyond simple recording — turning your captured screen into a fully narrated, localized, and branded video.
🔹 How It Works:
- Visit AI Studios.
- Select the Screen Recording feature.
- Record your screen directly in the browser.
- Add a realistic AI Avatar to narrate your video.
- Choose from 2,000+ avatars and 150+ languages.
- Apply AI dubbing, subtitles, or templates.
- Export your video in HD format for social or corporate use.
💡 Pro Tip: Record your tutorial once, then use AI Studios to generate versions in different languages — perfect for global audiences.
🔧 Key Features of AI Studios Screen Recording
- Record screen and webcam together
- Add AI avatars for realistic narration
- Translate automatically into 150+ languages
- Access 7,000+ templates for YouTube, TikTok, or corporate videos
- Auto-generate captions for accessibility
- 100% browser-based (no installation required)
💰 Pricing (Yearly Billing)
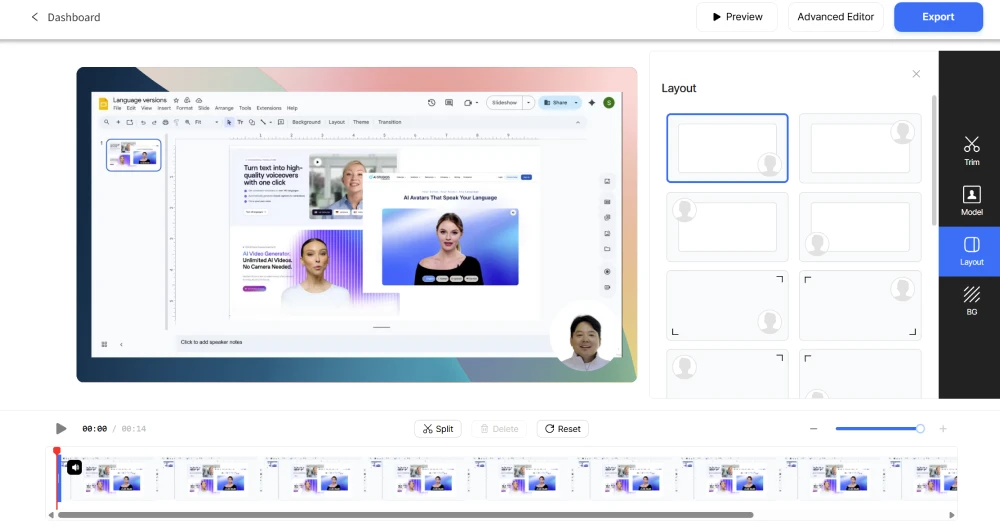
4. Enhance Your Mac Recordings with AI Studios
Once you record your screen, don’t stop there — make it engaging.
AI Studios lets you:
- Add AI voiceovers that sound human
- Use custom avatars to represent your brand
- Generate subtitles automatically
- Apply professional templates and transitions
- Reuse your recording in different languages and formats
What used to take hours of video editing now takes minutes.
5. Export and Share Your Video
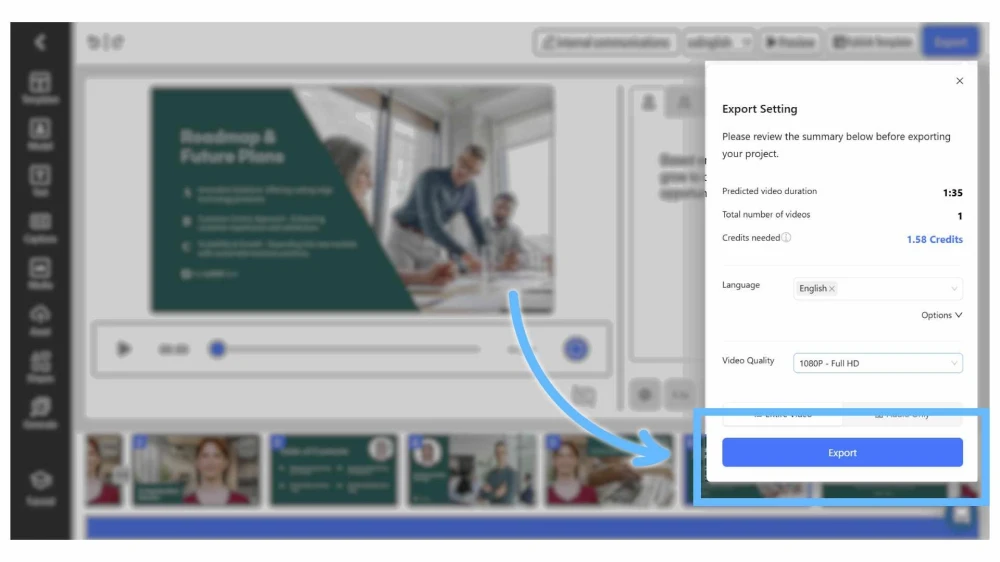
Once your video is complete:
- Export in MP4 or MOV format.
- Upload directly to YouTube, Vimeo, TikTok, or LinkedIn.
- Embed in presentations or company documentation.
💡 Pro Tip: Use AI Studios’ “vertical template” if you plan to repurpose your screen recordings for TikTok or Reels.
Why AI Studios Is the Best Screen Recorder for Mac in 2026

While macOS tools are great for simple recordings, AI Studios takes it to the next level —
combining recording, narration, localization, and branding into a single browser workspace.
🔹 Standout Advantages
- 150+ language dubbing
- 2,000+ avatars
- 7,000+ templates
- Browser-based, no app installation
- Professional-grade video quality
Create once. Present everywhere — with AI Studios.
Final Thoughts
Screen recording on Mac has never been easier or more powerful.
Whether you’re using QuickTime for simple recordings or AI Studios for full narrated presentations, you can produce professional results without editing experience.
If you want to create videos that teach, explain, and sell —
Start with AI Studios and elevate your recordings with AI.
FAQs
1. Does Mac have a built-in screen recorder?
Yes. You can use QuickTime Player or Command + Shift + 5 to record your screen without any extra software.
2. Can I add my face or voice while recording?
Yes. Use AI Studios to record your webcam or add AI avatars for a professional look and narration.
3. How can I record my screen with sound?
In QuickTime, select Options → Microphone Input before recording.
Or use AI Studios to automatically generate high-quality voiceovers.